In order to send and receive e-mail messages with the CLIE Mail application, a setup of mail account is required.
| Getting ready: Setting up the mail account |  |
Once a mail account is set, you do not have to go through this process again every time you send or receive e-mail messages.
Setting the mail account
| 1 |
Tap Applications tab, and tap the CLIE Mail application icon from the Applications screen.
|
|---|---|
| 2 |
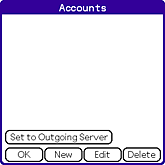
Tap Menu
The Accounts screen appears.
 |
| 3 |
Tap New.
The New Account screen for entering your name appears.
|
| 4 |
Enter your name and tap Next.
The screen for entering your e-mail address appears.
|
| 5 |
Enter your e-mail address and tap Next.
The screen for entering the e-mail server names appears.
|
| 6 |
Enter the e-mail server names of incoming (POP3) and outgoing (SMTP) mail servers and tap Next.
The “Internet Mail Logon” screen appears for entering the e-mail log-on settings.
|
| 7 |
Enter the account name and password your Internet service provider has given you, and tap Next.
|
| 8 |
Tap Finish.
A new e-mail account is entered on your CLIÉ™ handheld.
|
Editing the registered mail account
| 1 |
Tap Applications tab, and tap the CLIE Mail application icon from the Applications screen.
|
||||||
|---|---|---|---|---|---|---|---|
| 2 |
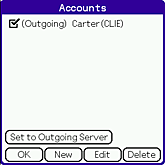
Tap Menu
The Accounts screen appears.
 |
||||||
| 3 |
Tap the desired mail account to edit, then tap Edit.
The Accounts screen appears.
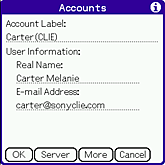 You can change the following items:
|
| 4 |
Tap Server when you want to change the E-mail server information.
The E-mail Server screen appears.
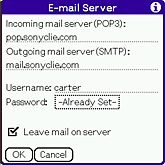 You can change the following items. Change those items following the information from your ISP.
|
|---|
| 5 |
When data input is complete, tap OK.
The Detail screen appears.
|
||||||||
|---|---|---|---|---|---|---|---|---|---|
| 6 |
Tap More.
The Detail screen appears.
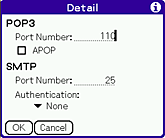 You can change the following items. Change those items following the information from your ISP.
|
| 7 |
When data input is complete, tap OK.
The Accounts screen appears.
|
|---|---|
| 8 |
Tap OK.
The e-mail account is set again on your CLIÉ™ handheld.
|
| 9 |
Tap OK.
The screen returns to the e-mail list.
|
Using two or more mail accounts
You can set up to eight mail accounts. For details, see "Changing e-mail accounts".